Showing posts with label Frankens. Show all posts

Friday, 26 October 2012

Oooooh Sparkles!

Hellloooooo everyone :)

I discovered something about my franken, Rainbow Dust. It ROCKS!

I made it a while ago by mixing micro glitter eyeshadow into clear polish. I knew it would settle as it wasn't put into a suspension base but I didn't mind as it's just for myself to use. A good shake and Viola!


To get this density, I gently rolled the bottle. It's over my other franken - Black Cherries.


You can see, with a gentle roll, the bulk of the glitter at the bottom of the bottle here.


Bokeh shots, love 'em! This is a blurred shot of the 1 thin coat.


This is a bokeh of the bottle shaken and re-applied to another fresh mani of Black Cherries. Again, this was only 1 coat. See the difference?! AMAZING!

This is it, after sitting overnight. I have Mixer balls in it so a slight roll and it's like the 2nd from top pic and a good shake makes it like the above pic. I love this stuff!


Not only is this an awesome topcoat but I also mix it with other colours to make holo colours. ... :D

I usually only mix a small amount with colours on a plastic lid and apply but recently, I made 2 holo frankens. I haven't named them yet but here is the red:


And the turquoise:


I tried to blur so you could see the holo.


I think this is a little under holo-ed, lol, so I might add more to these. These were made with a very small amount so the mixture I have would probably make about 30-40 holo polishes. Plenty to go around. :D

Hope you enjoyed reading,
Ellie


Friday, 12 October 2012

Requested Nail Art - Xbox Nails

Hi Guys :)

This was requested by my gorgeous hubby Gary on the facebook page :)

 
He has obviously already seen them and said he loves them, so I am chuffed to bits :)
 
Here is a list of the undies used:
 
Thumb, middle and pinkie, La Femme - Ebony, 
Index finger is Franken - Graphite,
and Ring finger is, believe it or not, ridge filler! lol!
 
I don't actually own a 'tipex' white so use that instead because I don't have ridges.
 
The logo colours are:
 
Thumb, middle finger logo and some swirls on the ring and index fingers, Vollare - No 96
Swirls on the index and ring finger, Vollare, - No 99
Swirls on index, Sally Hansen - Emerald City
Pinkie, Pink Tease - Red


Above is a slightly blurry but less shiny photo to let you see the ring finger a bit better. I didn't get many good pics of this :( But for those of you who want to know what the doodles mean, read on...

The thumb is the simple Power symbol.
The index finger is the current Xbox woosh logo.
The middle finger has gone a bit retro with the original Xbox X logo.
The ring finger is the Xbox ring/ripple/swirl logo.
And finally the pinkie is the dreaded RROD (Red Ring Of Death)!

Also, I tried something different with this mani. My lovely reader Bug had recently tried the dry marble technique and when I came to do this mani, I was reminded of it. So, The index, middle and pinkie were painted straight on the nail but the thumb and ring finger logos were painted onto a sandwich bag. I peeled them off when they were dry and then placed them onto the nails and covered them with clear polish. I tried to do all the logos this way but they ripped as I peeled them off the bag. But, nevertheless, I'm happy with this mani. :)

Hope you like it
Ellie

Sunday, 23 September 2012

Plastic Pink And Glitzy Tips

Boy, is that title a mouthful! I keep saying 'Plastic Plink'! Ha!

Hi Guys :)

Now, I'm not normally one to wear pink. Before I had my daughter, I don't think I had any pink in my house. In fact, The only reason I own pink polish is because Mr Pixie~Nails bought me a huge stash of polish (15 or so bottles) on a trip to Prague, and it included about 3 or 4 pinks. I then got some included in a bulk purchase on ebay. And from then, I have grown to like this once detested colour.

This is brand, La Femme. It doesn't have a visible name or number so I call it Candy. It's got a gorgeous plastic look about it and it's a super-girly barbie pink. If you look closely, you can see a slight shimmer but I didn't notice this irl. This went on like a dream. A perfect 1-coater if applied with care. I used 2, out of habit.


This is Chit Chat nail varnish - Pink. It is made exclusively for Poundland and comes in a variety of colours. I love these, they are jam-packed with glitter and wonderful for making frankens with.


These didn't need to be dabbed on like some glitter polishes as the glitter placed itself perfectly. The photo above was only 1 coat on the tips! Normally I'd have to dab, dab, dab to get this.

The next couple of pictures are the mani a few days old, about 3 if I remember correctly. I got bored, like I do after a few days so I added my Glitterball franken. It was made with loose, large holo hex glitters from ebay and Fairy Dust from La Femme.


So there you have it, possibly my last vault photo for now. My nails are back to a decent state so I will be ok posting pics of them. XD

Later Nailies :D
Pixie~Nails

Wednesday, 19 September 2012

I Love Me Some Schlurple!

Hi guys!
More from the vault today :)

This is Schlurple. It's a mid-purple based franken with small and large indigo and pink glitters.
These 2 photographs are Schlurple on it's own, 3 coats.
 
3 coats, indoors, with flash.
With flash.
Indoors, without flash.
The next photograph is 1 coat of Schlurple over black. I have no idea which black as I never write any of this down! It's most likely La Femme. This is a terrible pic but I just had to show you how awesome this looked! Look at those mismatched nails. Shocking! Ha! I chose the name Schlurple as this purple and pink mix reminded me of a famous soft drink that had/still have the slogan 'shlurple the purple'. I just changed the spelling for trademark reasons.

1 coat over black.
And as for my nails, they are getting back to their normal self so I will start posting current mani's again soon :D

Til next time, my favorite Nailites
Pixie~Nails

Sunday, 16 September 2012

Grey tips and Glequins

Hi guys :D

For the next week or so I am going to post pictures from my vault as my nails have been battered from the family holiday :(

I had no nail care for a week and that led to splits and breaks and bad cuticles... euuggghhh.... sooo, I had to bite the bullet and file them all down to little baby nubs. Sad face.

Anyhoo, here is a mani I had on from a few weeks before the holiday.

First off, I put on a base coat and tipped them with my grey franken - Graphite.


This has a gorgeous shimmer to it:


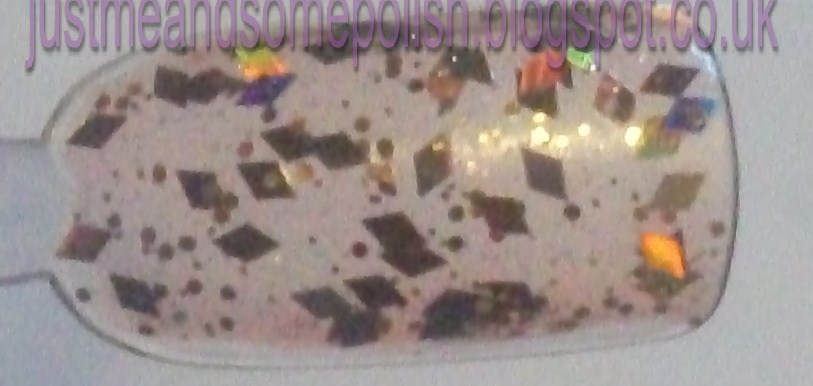
I then added some single largeish hex glitters to my nails in random designs:


These are the glitters I used:


I topped this off with 2 coats of your basic top coat and voila!

Hope you like
Pixie~Nails

Saturday, 18 August 2012

Autumn nails!

PICTURE HEAVY POST!

I know it's a few weeks away yet but I thought I'd show my frankenfall polish simply called Autumn :D

Close up of bottle
The large slice glitter in this is a holographic brown which flashes all colours.
Getting photographs of this that showed all the colours, that didn't glare or blur was quite difficult!
On one hand, I layered the whole nail with Autumn.

Layered on top of brown


On it's own
This was made by mixing alot of orange glitter in a clear base with a very small amount (2/3 drops) of the brown i wore underneath this. I also bought some gorgeous loose glitter from ebay and mixed loads in. I'm not sure why it looks so dark in the bottle because you can see that it's super sheer on the nail wheel sample above!
The gorgeous brown and glitter used
On the other hand I placed loose glitter on top of wet top coat to make them stick, then covered in another topcoat. This was also difficult to photograph.


The bottom few pics showed the colour flashes best but irl this is stunning. If you look at the bottom couple of pics you can see that the glitter is different colours in each shot with greens and oranges and reds and blues. This is the kind of polish/glitter mani that needs a video! maybe next time :) If anyone is interested, I will post the link to the glitter on ebay.

til next time
Pixie~Nails x

Thursday, 16 August 2012

Franken - Midnight Kisses

Hi guys! :)

Today, I'm showing you another franken I made, called Midnight Kisses.
This was made by mixing a lot of black with some drops of red and a good helping of purple/pink glitter. It came out very dark in the pics but IRL, it's not so dark, you can make out more of a reddy tinge in sunlight (something we are not having much of lately!)
bottle in bathroom

indoors, no flash

indoors with no flash
This was a terrible picture post! haha! I really need to make some kind of light box to take my pictures but I'm not sure how to. If I get some decent photos of this, because it is lovely, I will repost them.

Til next time
Pixie~Nails x

Thursday, 2 August 2012

Wave nail art

Hello my little nail polish addicts :D

I'm in a very good mood today, don't know why but don't you just love that happening :)

Anyways, polish.... I have wave nail art for you today. This has been painted over my last mani, my Moonlit Ocean franken. The 'ocean' bit gave me the idea for this art. (Ha! you don't say Ellie!)

The finished look
I get bored easily and a day after putting on some polish, I am already thinking to myself  'What can I add to this mani?' Sometimes, when I add things - glitter, nail art, bits I find lying around - it works, sometimes it doesn't. This time I think it did.

My tools for the Wave look
I don't yet own any nail art brushes but as I'm a painter I have a million brushes lying around so I use one of these. It does the job :) I noticed I didn't get a picture of the teal glitter used on the tips... :/ But a group shot including it can be found in my stash link for the minute, till I get a single shot to post here.

Ok, first I very untidily painted a wave shape on my nails with Pink Tease in white.


Then I roughly filled in half the wave with same.

Then I added some more of the Moonlit Ocean and white with the paint brush to blend them together a bit. Make sure you stipple the edges of the wave to give it a frothy, splashy... you-know-what-I-mean, kind of look. :D


This is what you should end up with.

 Give it a top coat to get rid of the stipply brush marks.


I then decided to add some glitter to them to give it that 'moonlit' sparkle. Then added another top coat. My nails should be an inch thick with all these coats!!

glint!


Don't forget to click on the pics to enlarge them.
Hope you like
See ya soon :)

Pixie~nails x